
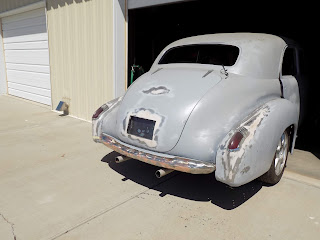
Custom Built Bumper for the 4105
The existing bumper looked out of place at the back of the 41 Cadillac and I decided to modified it to fit in close to the back between the rear fenders.
 The stock bumper was set in place and as you can see dose not fit the back of the car. It was marked for center and where the first cuts will be made. This is a cut and fit as you go to get the look that I want.
 Once the ends were cut off it could be slid under the gravel pan and scribed for the curve of the back of the car.
 The top part of the bumper was cut off and I got part of the curve but still not enough.

 I bent a 1"X 1" square tube to match the curve of the gravel pan then clamped it to the bumper as it was pulled and bent to match then welded the top first as it was bent into place. The bottom was bent as necessary, clamped at each cut then welded.

 It now fit the back of the car and was pulled in to the gravel pan but something had to be added at each end.
 The ends that were cut off the stock bumper were cut down to match the reshaped bumper.
 Each side was scribed to fit the angle and keep the center line of the bumper consistence then welded in place.
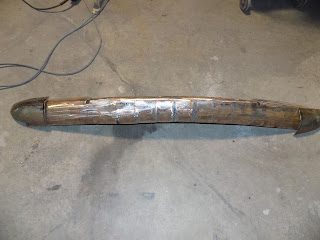
 Above and below you can see where the pointed end of the bumper was cut off, trimmed down then welded back to form the turned back end of the bumper.
 The mounting bracket's were bolted to the existing tabs on the back of the bumper then I used an acetylene torch to heat and bend them to fit then drilled a hole close to were the bend is for the second tab is.
 With both brackets in place it was placed on the car to see where the brackets needed to be cut to fit the frame.

 After the brackets were cut off the bumper was put in place, ends of the brackets held to the frame mounting holes, marked, cut then bolted to the frame and welded to the bumper.
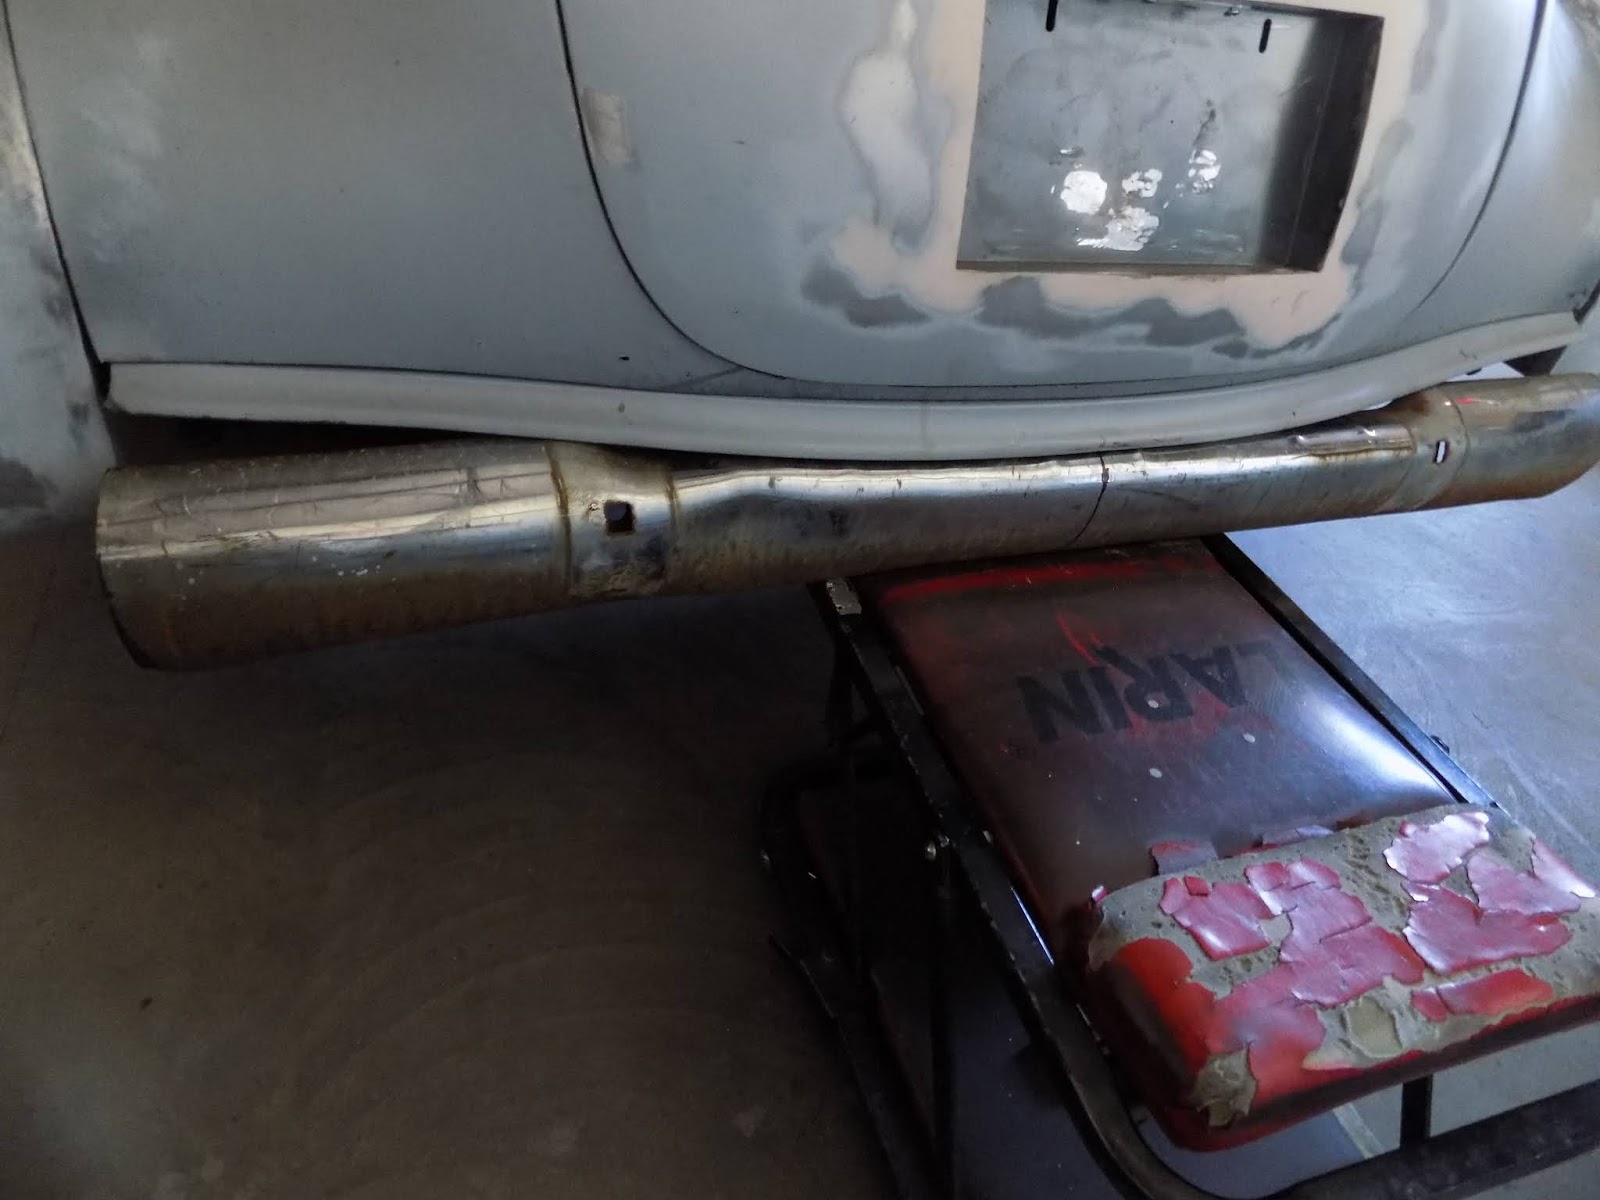
 With the bumper in place the tail pipes were fit and welded in place, supports fabricated and installed.

 The bottom inside edge of the fender will be reshaped to match the ends of the bumper, other than that I like the new look.

(The picture below is the finished reshaped bumper.)


7 cuts were made on top & bottom so it could be bent into the curve shape.


All the welded seams were ground with a 40 grit flapper disc.


The brackets were cut apart then the one side to be used was sand blasted.


1/2" bolts were welded in to fill the two holes where the bumper bolts use to be.


The reshaped bumper and completed exhaust system looks pretty good.


Comments